5 Tips for Taking Better Pet Photos With Your Smartphone
Hiring a professional pet photographer to capture your cherished pet is always a good idea! But, what about the day-to-day photography you capture yourself? Does it never look quite right? Does your pet have red or green eyes, or the room is too dark?
Here are five tips for taking better photographs with a simple Smartphone camera.
1. Remove the clutter, or change your angle.
When photographing any subject, unless the items or scenery in the background are part of the “story” you are telling with your photograph, those things can be distracting and compete with your subject. Try moving distracting objects out of the frame, or instead of keeping your camera level, try tipping it slightly downward/forward until the background is no longer in the frame. When your camera is tipped, the floor essentially becomes your background!

Before

After
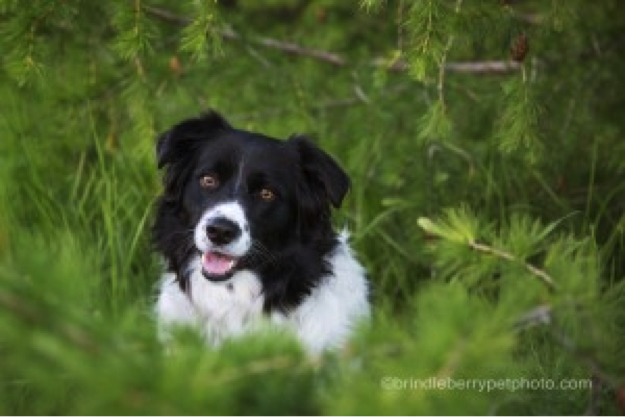
2. Keep your camera focused on the face and the eyes.
You may see professional photographers take photos that focus on one thing sharply, and create blur with the rest of the photograph. This can look really neat, but it’s tricky to do without professional gear. Most smart phones allow you to focus in on an area, so keep that area on the face and the eyes. Photos that focus on the eyes bring people into the photo and really show your pet’s personality.
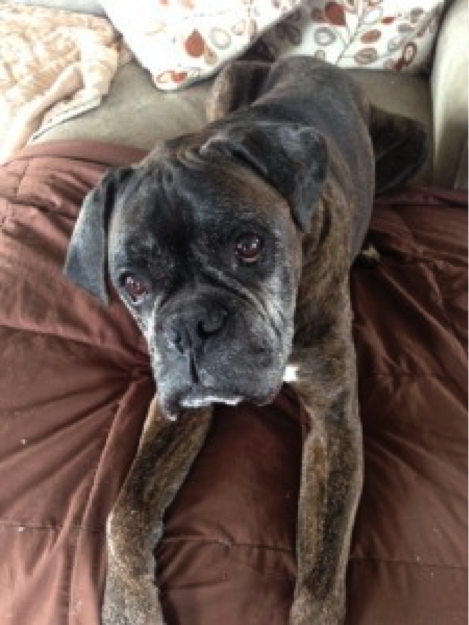
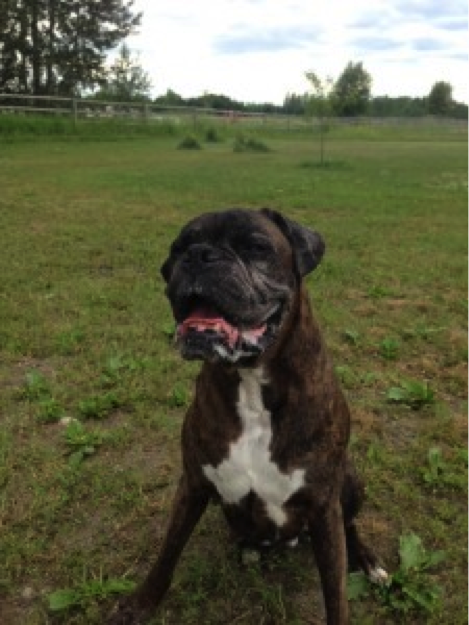
3. Turn off your flash.
Those red and green glowing eyeballs are due to your on-camera flash that automatically fires in low light – usually indoors. Take a few minutes to peek through your camera setting and turn off that flash! Photos always look better with natural light, so if you can, have your pet sit near a well-lit part of the room – near a window for example. When they look into the light, snap your photo. If the room is lit well enough, your camera should take the photo without delay and with no blur. If the room is still too dark, go outside if you can.

Before

After
4. Keep your sessions short and reward frequently.
Animals have short attention spans, so it’s always a good idea to not make them work too hard for too long. Posing your pet and asking them to hold a position is essentially training for them, and can be mentally exhausting! When done properly, it can be fun for them and teach them that having their photo taken is really fun! But, if you pass the point of “fun” it becomes a negative experience for them. Once you capture a few good shots, give lots of praise and rewards and end the session.
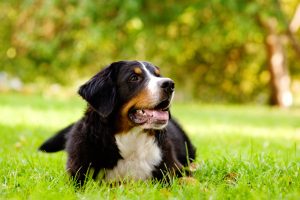
5. Turn your subject toward the sun when outdoors.
Professional photographers can make almost any direction of light look good! But this takes experience and usually a camera with manual settings that can be changed appropriately. For everyday photos, have your subject face into the sun so that their eyes are bright and visible, and they have that little sparkle of light called a catch light. Early or late in the day this can be done just about anywhere, however when the sun is high in the sky, move your subject into the shade. This will prevent harsh shadows from falling on your subject.
Before

After
Following these few simple tricks should help you take better photos of your pets! With practice, your pet will become a model in no time!
All of the above photos were taken with an iPhone. Smart phones are typically very slow to capture a photo, and with pets, you need to be very fast. You will likely notice some motion blur with a Smartphone if your pet moves at all – unless the light is very good.
Guest blogger Holly Montgomery is a professional pet photographer, and owner/photographer at BrindleBerry – Custom Pet Photography. To learn more about her, or to view her portfolio, visit her website at www.brindleberrypetphoto.com.